mavQT-Bridging MAVLink Drones to IoT via MQTT
A lightweight tool to forward MAVLink messages to MQTT brokers in real-time, connecting drones to the wider IoT ecosystem
2 min read
Installation and Setup
-
Clone the repository:
Terminal window git clone https://github.com/rohith8272/mavQT.gitcd mavQT -
Create a virtual environment and install dependencies:
Terminal window python -m venv venvsource venv/bin/activate # On Windows: venv\Scripts\activatepip install -r requirements.txt -
Run the tool:
Terminal window python -m mavQT
Setting Up an MQTT Broker
Before running mavQT, ensure that an MQTT broker is available to receive MAVLink packets.
Option 1: Run a Local Broker (Mosquitto)
-
Download Mosquitto:
https://mosquitto.org/download/ -
Navigate to the Mosquitto installation directory where
mosquitto.exeis located. -
Create a configuration file named
sample.confwith the following contents:# Default listener (local + remote)listener 1883 0.0.0.0# Allow anonymous connectionsallow_anonymous true# (Optional) persistencepersistence truepersistence_location mosquitto/ -
Start the broker:
Terminal window mosquitto.exe -c "sample.conf" -vThe broker should now be running on port 1883.
Option 2: Use an Online Broker
If you prefer not to run a local broker, you can use a free online MQTT service like:
Forwarding MAVLink Streams
To connect your MAVLink stream to mavQT, ensure your flight controller or GCS is sending data to the correct UDP/TCP port. If you haven’t set up Software in the Loop(SITL) simulations before, you can use: https://dronesim.xyz/
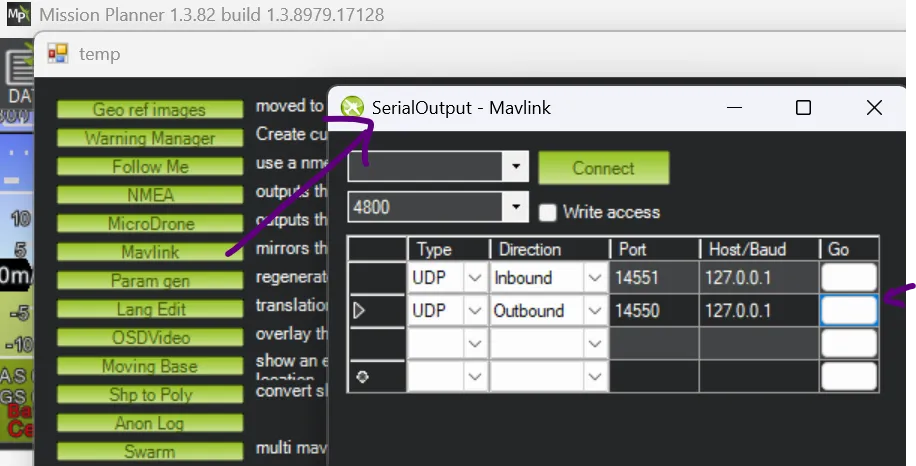
Example 1: Using Mission Planner
- Set UDP outbound on port 14550.
Example 2: Using MAVProxy
mavproxy --master=tcp:127.0.0.1:5760 --out 127.0.0.1:14550For more information on MAVLink routing, check the DroneSim documentation:
Forwarding MAVLink Packets
Testing mavQT
- Connect mavQT to your MQTT broker using its IP and port.
- Subscribe to or publish MQTT topics to view real-time MAVLink data.
- Adjust QoS levels as needed for reliable message delivery.
Example usage:
python -m mavQT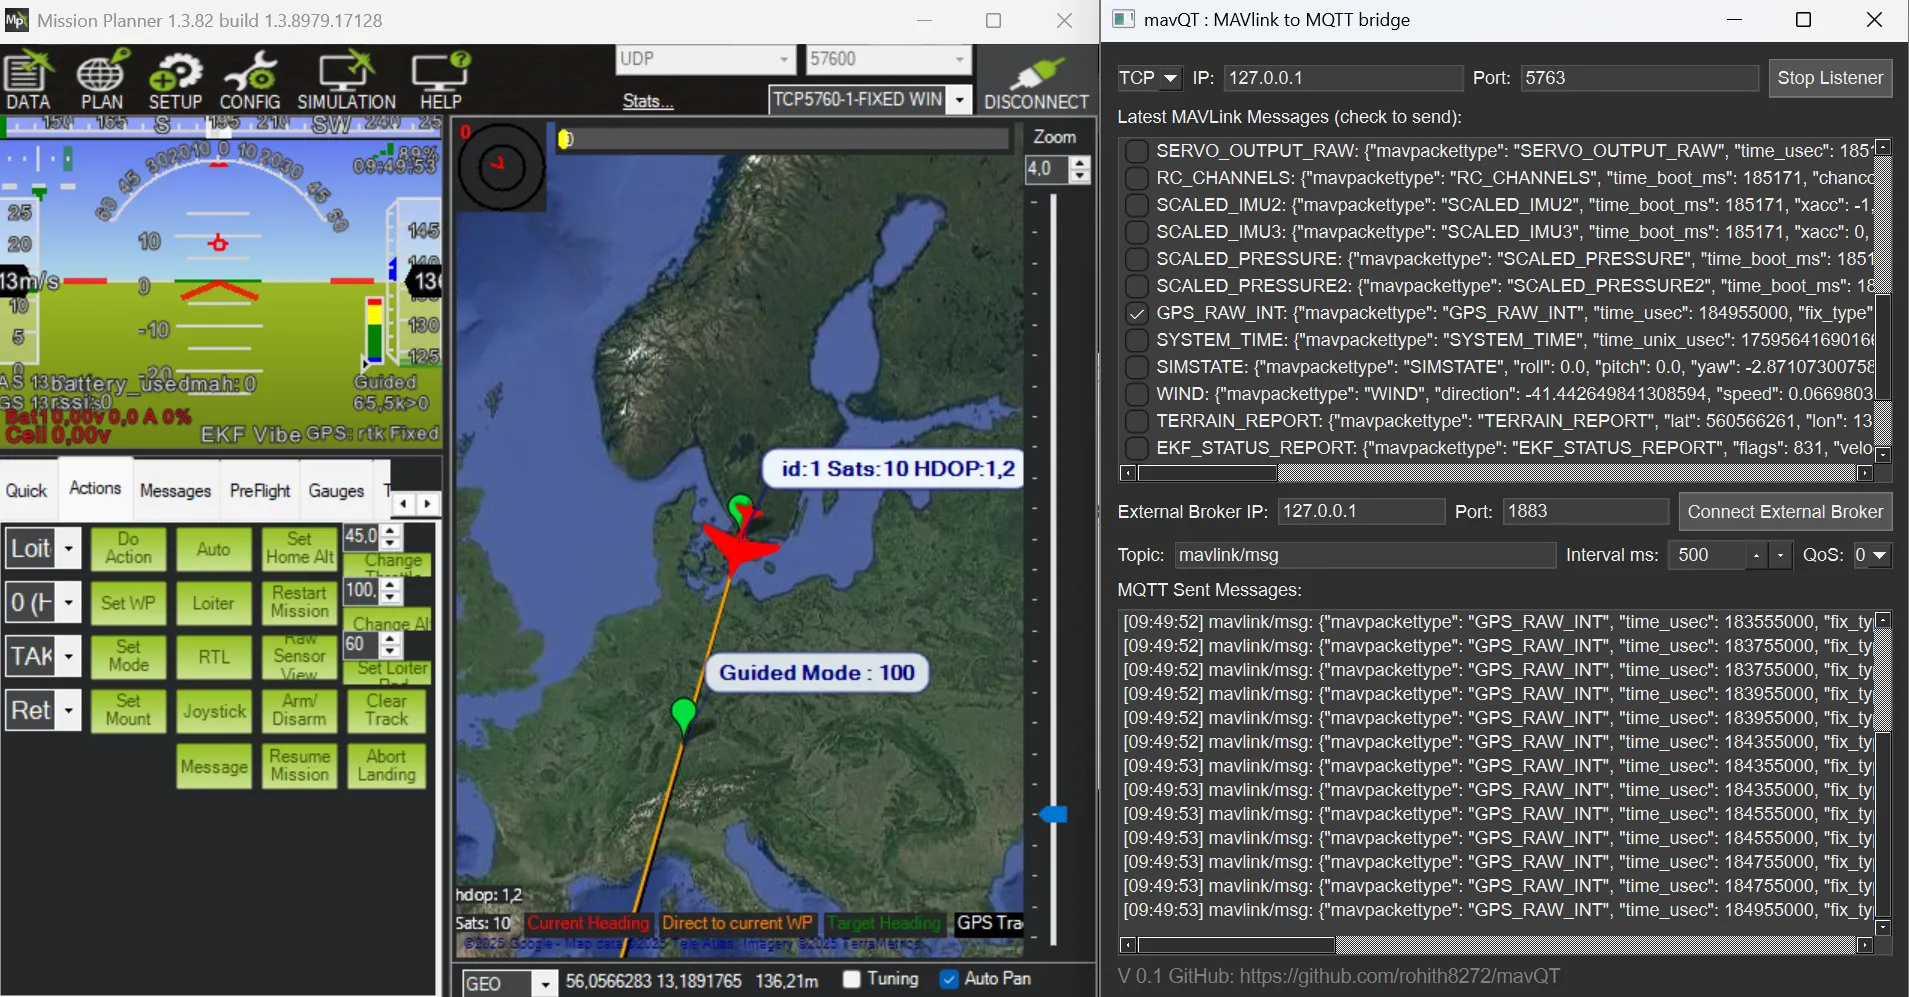 On connection to an active MAVLink stream, new messages are auto discovered. I can now check the messages that I would like to broadcast with the custom topic name (default mavlink/msg). The bottom terminal should now show the client topics. You can also recieve the topics on any device with an mqtt client within the network or using a VPN.
The MAVLink packets are sent as soon as they are received by the tool, while it is also possible to set a time interval and QoS level.
Contribute
The current tool is a PoC and you are free to modify and alter it to your requirements. If you’d like to improve mavQT, report bugs, or suggest features, feel free to open an issue or submit a pull request.
📍 Repository: https://github.com/rohith8272/mavQT